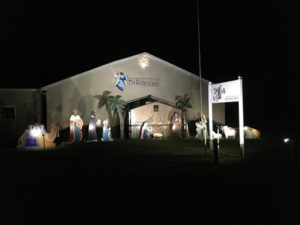
The Life of Christ project has been done in stages. The first stage was the life size Nativity. Sheldon was talking with Gene Davis at church about our vision of having a life size Nativity. Sheldon had looked at some plans online but had not ordered them yet. Gene said that he had some plans that he had ordered but hadn’t done anything with them yet. He offered for us to take a look at them. Low and behold, they were the SAME plans that Sheldon had looked at. That pretty much confirmed that this was the route we were to go. In other words, that was a God thing.
We had a Christmas in July work party. Several people came to transfer the patterns onto plywood. We used 1/2″ plywood. Not just any plywood, but the kind used for making road signs. At that time it was quite expensive but we wanted something that would hold up in the weather.
It was a fun day. We had Christmas music playing all day. People brought Christmas cookies. Sheldon did his Christmas magic and juggling program and we got a lot done. Several men worked on cutting the figures out. Some of the ladies put a base coat of paint on them. Some of the other men drilled holes in the ground with a post hole digger and put cement around PVC pipes in the ground that would hold the pipes supporting the figures.
The actual painting of the figures took quite a long time. Vicky, Susan and Diana were our main artist who did the painting. However, from time to time, other people would come and lay down some of the base colors. We used acrylic paint and then sprayed a clear protective finish on afterwards. Needless to say, it took a lot of paint and time. They turned out great and we are pleased with the results. However, some of them are starting to show the results of years in the snow, etc. A couple have had to be touched up. We love what we have but, can also see that they will continue to need maintained from time to time.
One of our board members, Fred Bell, built a stable for Mary, Joseph and baby Jesus. The stable is all hinged together and folds down. Ya, it’s heavy but it makes it nice for storage.
A couple of years later we added a back to the stable. Vicky and Susan added some more animals to the back which really made it look great. If you look, you will see three crosses in the window. At first we were just going to have dividers making up 4 pains in the window. Then we realized that instead of those dividers, they could be crosses instead. It’s kind of a reminder that the reason for Jesus birth was so that He could die. When the light’s on at night, the crosses cast a shadow onto the front of our office building. Nice touch.
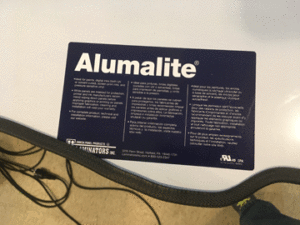
By the time we were ready to add the other scenes to the Life of Christ, things had changed to the point that we took a totally different approach. Instead of the 1/2″ plywood, we went with a product called Alumalite. Basically it is made up of two very thin sheets of aluminum with corrugated plastic in between. It is made similar to a cardboard box but, instead of cardboard, it is aluminum and plastic. We thought the plywood was expensive. The Alumalite is almost three times as much. However, this is what outdoor signs are being made out of now. We won’t ever have to worry about it rotting and needing to be replaced. So this should be a once and for all investment.
As a side note, if or when the new scenes should need to be replaced, it should just be a matter of hitting the print button and mounting them to the same aluminum. We don’t want to test that theory though.
Let’s take a look at the process of making the new scenes.
We started with a script which had a picture to represent the scene we wanted. Next to it we added the narration that goes along with the picture. We noted the Bible passage where the story can be found and any other notes to remind us what we wanted to do with each scene. This included the AR elements we wanted to add.
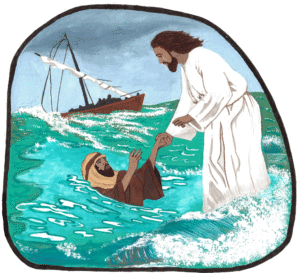
We could have chosen any of the scenes to show the process with. However, let’s take a close look at Jesus rescuing Peter. Let’s follow it through from the original picture to the final product.
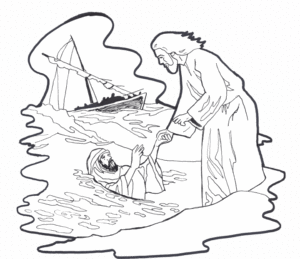
Rod Snow took the script and drew original pictures of each of the scenes. Basically what he did was a black and white coloring book type drawing. Yes, we will be making a coloring book available of the entire display. We wanted original pictures that would all be done in the same style by the same artist. We asked Rod to use a similar style as what we had for the Nativity. This keep us from having to contact various artist and pay for permission to use their work. It keep the styles the same and gives us full rights to the pictures. Now we can do what we want with them. That’s something you need to be careful of these days.
Rod did each drawing on 8 1/2″ x 11″ Bristol in pencil and then inked them in. The first thing we did was scan them into a computer and print them out on plain paper and also on Bristol. The plain paper copy was used for reference as the Bristol version was painted on.
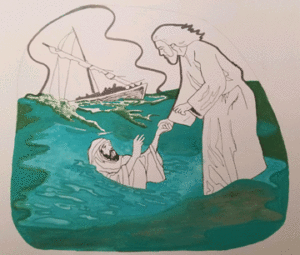


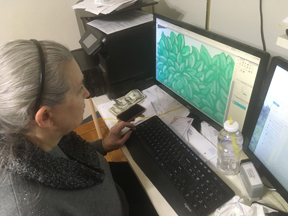
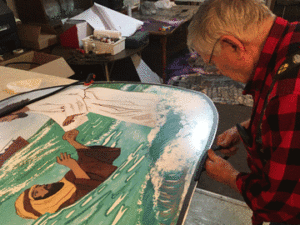
This time Gouache paint was used. Vicky had not done anything with Gouache before but, she quickly picked up on it and did an amazing job. At times Vicky and Susan were painting using a magnifying glass in order to get the fine detail that they wanted.

Several images received a final digital touch up.
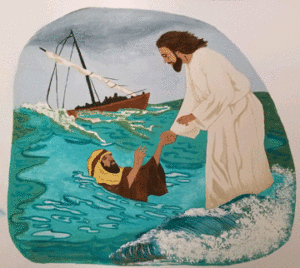
Once the paintings were finished, they were scanned into the computer. That image was then vectorized so that it could be enlarged without loosing any of the detail. Those files were then sent off to be printed. The size of the image was determined by the size of the material they were to be mounted onto. We chose a product called Alumalite to mount them to. We found that we could buy it in 4′ x 8′ sheets or 4′ x 10′. By placing the images just right, we were able to get two out of a 4′ x 10′ sheet which made each one less expensive. The prints came back in just a few days.
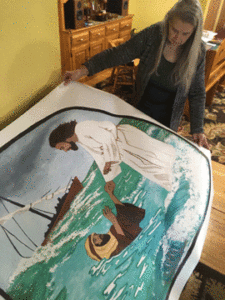
Vicky checking out the final print when it arrived.
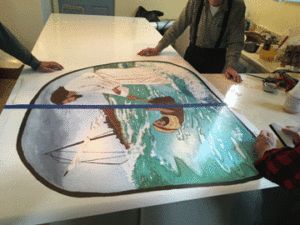
The print being mounted to the Alumalite.
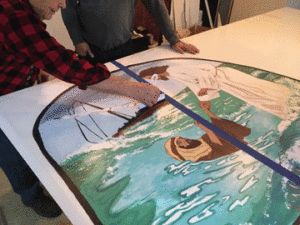
All of the bubbles and wrinkles had to be worked out.
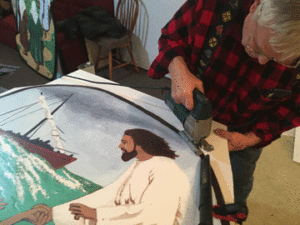
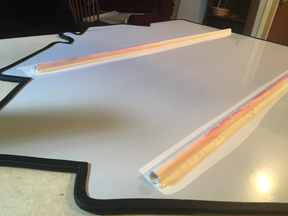
Susan and Vicky put a nice wide black boarder around each finished painting. This does two things for us. First it sets the picture off with a nice boarder. Second, it allowed us to put a rubber edging around the Alumalite to keep it protected. This also makes it easy to handle without getting cut. It gave us a nice line to follow as we used a jigsaw to cut them out.
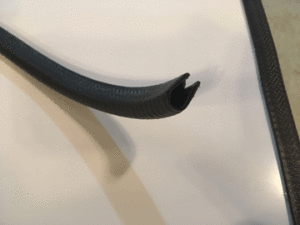
Fred Bell putting the rubber edge on.
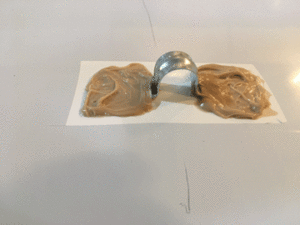
For the Nativity, we were able to screw brackets onto the back. We then put pipe through the brackets and into the ground to support them. However, being that the Alumalite was only 1/4″ think, we were not able to screw into it. We also didn’t want to be drilling holes through it which would mess up the pictures. So we decided to use a maximum strength liquid nail adhesive to attach smaller brackets onto the back of each painting. We then used 1/2″ rebar driven into the ground to support them.
The goal was to have everything ready and set up in December of 2021. We had about half of the scenes finished and up and two days later harsh winds came through and took most of them down. We found that the brackets that we had glued on the backs would not hold. That forced us to look for a more secure way. We ended up gluing 1/2 inch PVC to the back. The rebar fits through it fine and time will tell if this method holds up.
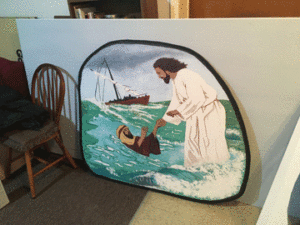
Finished and ready to go on display.
So that was the process. The beauty of doing it this way is; if necessary, we can print another copy and hopefully mount it to the same Alumalite should we need to replace one. The “copy” will be the same quality as the first one because we would be using the same file. Then, should you or anyone else want to have a Life of Christ display, it would just be a matter of hitting the print button and having them shipped to you. Let us know if this would be something you would be interested in doing. We are not limited to just the scenes that we are using now. We can expand the display at any time. Let us know if there is something that you feel we should add. Keep in mind that we only have so much property.